Fabric Mask Tutorial
With the pandemic numbers rising, and the availability of PPE dwindling, many people have started sewing masks to donate to local essential businesses and for their families and friends. At the beginning of the month, just before California mandated masks to be worn just about everywhere, I pulled out my scrap fabric stash and got busy!

Trying to learn how to “smize”.
I used THIS pattern from STATE, the label, and modified it for use without elastic. When I began sewing, I had enough elastic in my sewing box to make mayyybe two masks, and elastic was completely out at local fabric stores, with delayed shipping from online vendors. Because of these limitations, as well as consideration for elastic possibly not holding up as well through multiple rounds of washing and sanitizing, I decided to use fabric ties instead.
This style of mask is my own personal preference, as I like the aesthetic of cleaner lines. While looking through other tutorials, it also seemed like this pattern would be the simplest to make. The pleated style masks require a lot more pinning, sewing, and tedious details, but the straight lines create less fabric waste and the pleats are more adjustable over the face. One advantage of using fabric ties, rather than elastic, is that you avoid the gap where the fabric bunches by your ears. With fabric ties, you can make a ton of the same design, but each individual wearer has more control over the fit. This mask pattern also gives the wearer the option to add a replaceable filter between the fabric layers.
YOU WILL NEED:
Main fabric (at least 8” x 12”)
Lining fabric (at least 8” x 12”)
Tie fabric (6” x 14”)
Straight pins, scissors, and a needle and thread or a sewing machine
Iron and ironing board
The best kind of fabric to use for these masks is a tightly woven cotton. Jersey or stretchy fabrics are woven loosely, which makes them less effective at filtering germs. Make sure you wash and dry your fabric beforehand to prevent shrinking when they are washed later. If you are using patterned fabric, orient the pattern horizontally for the best use of the print.
Follow the original tutorial on STATE, the Label’s website up until you turn the mask right side out. Then come back here for the instructions to make the fabric ties, or continue with their instructions to use elastic.
THEIR INSTRUCTIONS:
“Cut two of the pattern from the main fabric. Then, fold along the dashed line and cut two pieces from the lining fabric.
Fold the side edge of the lining in 1/4” so wrong sides are touching. Topstitch. Repeat for other side edge of lining.
With right sides together, sew center front seam of lining. Repeat with the main fabric center front seam.
Place the mask lining on top of the mask main, with right sides together and aligning the center front seams. Pin, then sew the top and bottom seams from one end to the other.
Turn the mask right side out.”
A partially finished mask, before adding the fabric ties.
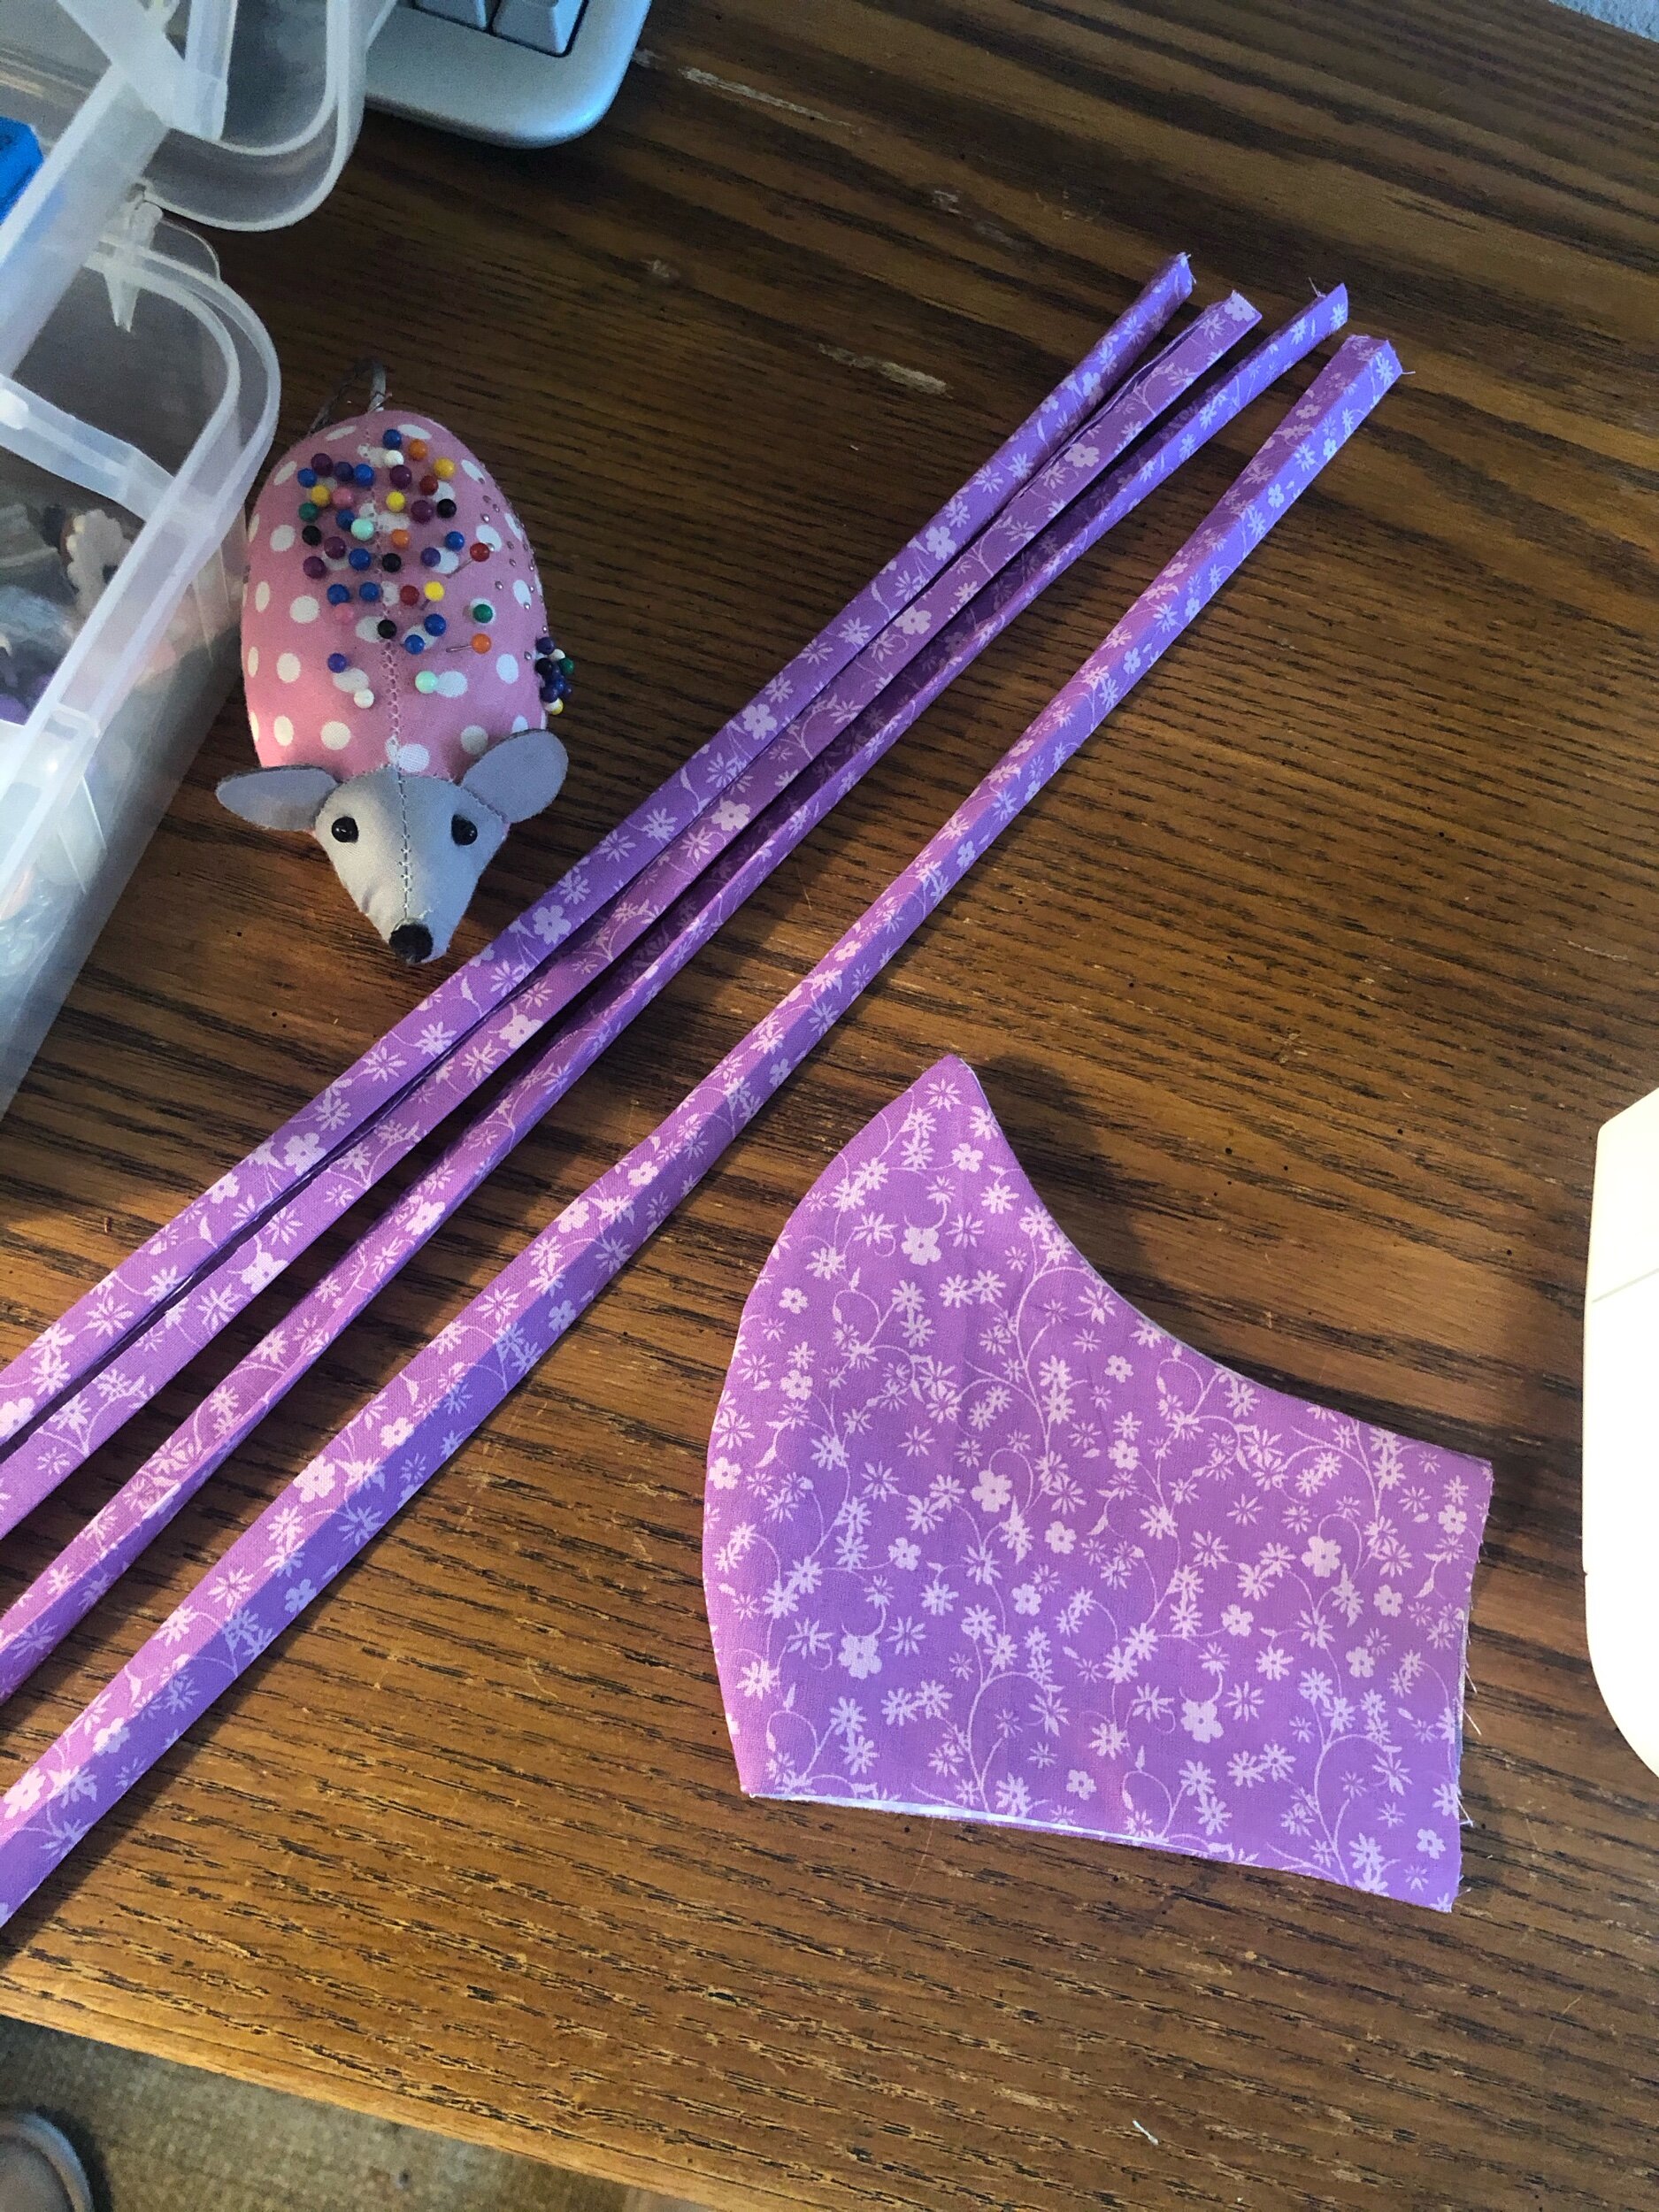
FABRIC TIE INSTRUCTIONS:
Cut your tie fabric into four even strips measuring 1.5” x 14”. Fold each strip in half lengthwise and iron flat. Open the strip back up. Fold the bottom edge up to the center fold and iron, then fold the top edge to the center fold and iron. Fold the center fold again so that all raw edges are tucked in. You will have one 3/8” x 14” strip of fabric. Repeat for all four strips.
With the main mask fabric facing down and the lining facing up, fold both edges of the main fabric in 1/4”, and then fold in another 1/4”. Press and pin.

Insert your first tie under the folded edge, all the way at the top, then fold over, so that the tie goes straight out from the side of the mask. Pin and repeat at the bottom edge of the mask, and on the other side.
Sew down the folded edges, going over the ties twice to reinforce them. Then, sew down the length of each tie, closest to the open edge, to close the raw edges in. When you get to the end of the tie, tuck the raw end into the fold, and sew down.
Make sure you wash your mask before you wear it, as well as between each subsequent use. Making our own masks saves medical grade masks for front line workers and those at a higher risk. Many areas have mandated face coverings be worn in public areas. Use up your fabric scrap stash and make something useful! Make them for your family, friends, neighbors, or donate to essential workers. Make one to match every outfit!

Some of the masks I’ve made for friends.
Wearing masks while we are out in public helps contain some of the germs that would normally spread from our mouths and noses. Wearing a mask mostly protects others, but if everyone wears one, we will all be safer! If your local authorities have asked you to wear a mask in public, please comply, not for yourself, but for the safety of others. We are all in this together!

I hope all of my readers are staying safe and healthy during this pandemic. During these uncertain times, I extend my love to all of you. I hope this tutorial helped you create something to make you feel safer, or even just inspired you to learn to sew while you’re under shelter-in-place orders. Thanks for reading!

Fabric masks are washable and reusable. Be sure to wash before first use and between each subsequent use.
Fabric masks are not a replacement for medical grade protective equipment. If you need that type of equipment, please consult a healthcare professional. The instructions in this tutorial are for personal use or donation only, not to be copied and sold for profit.
Using a mask does not replace other recommended measures to stop the community spread of COVID-19. Please continue to follow CDC guidelines, practice social distancing, wash your hands, and refrain from touching your face.
Read my post about getting out of Iran just before the borders were closed to limit the spread of COVID-19 here.